准备开始转向用 VSCode 做开发,所以把一些常用的开发环境转移到 VSCode 上。这篇介绍关于 C++ 的开发环境。博主打算就是中小型的不涉及界面的就用 VSCode 开发 C++,如果涉及 windows 界面的还是用 Visual Studio 这种 IDE 比较好。
测试环境
- Windows 8.1
- VSCode v1.11.1
- tdm-gcc v5.1.0
安装 Visual Studio Code
去官网下载 VSCode 并安装: https://code.visualstudio.com/Download
安装 VSCode 的 C++ 插件
在 VSCode 上搜索插件 C++,找到作者是 Microsoft 的,安装即可。或者 Ctrl+P,再输入 ext install cpptools 进行安装。
安装 TDM-GCC
VSCode 默认不带编译和调试环境的,需要自行安装编译器等。
我选用的是 TDM-GCC 编译套件,方便易用。(Codeblocks、Dev-Cpp 等默认带的都是这款)。
下载地址:http://tdm-gcc.tdragon.net/download 根据自己的情况下载安装即可,会自动添加路径到环境变量 PATH。
配置 VSCode
安装好插件之后,在磁盘新建好自己的工作目录,比如我的是 D:\Dev\DevCpp,在 VSCode 的资源管理器中打开这个目录,
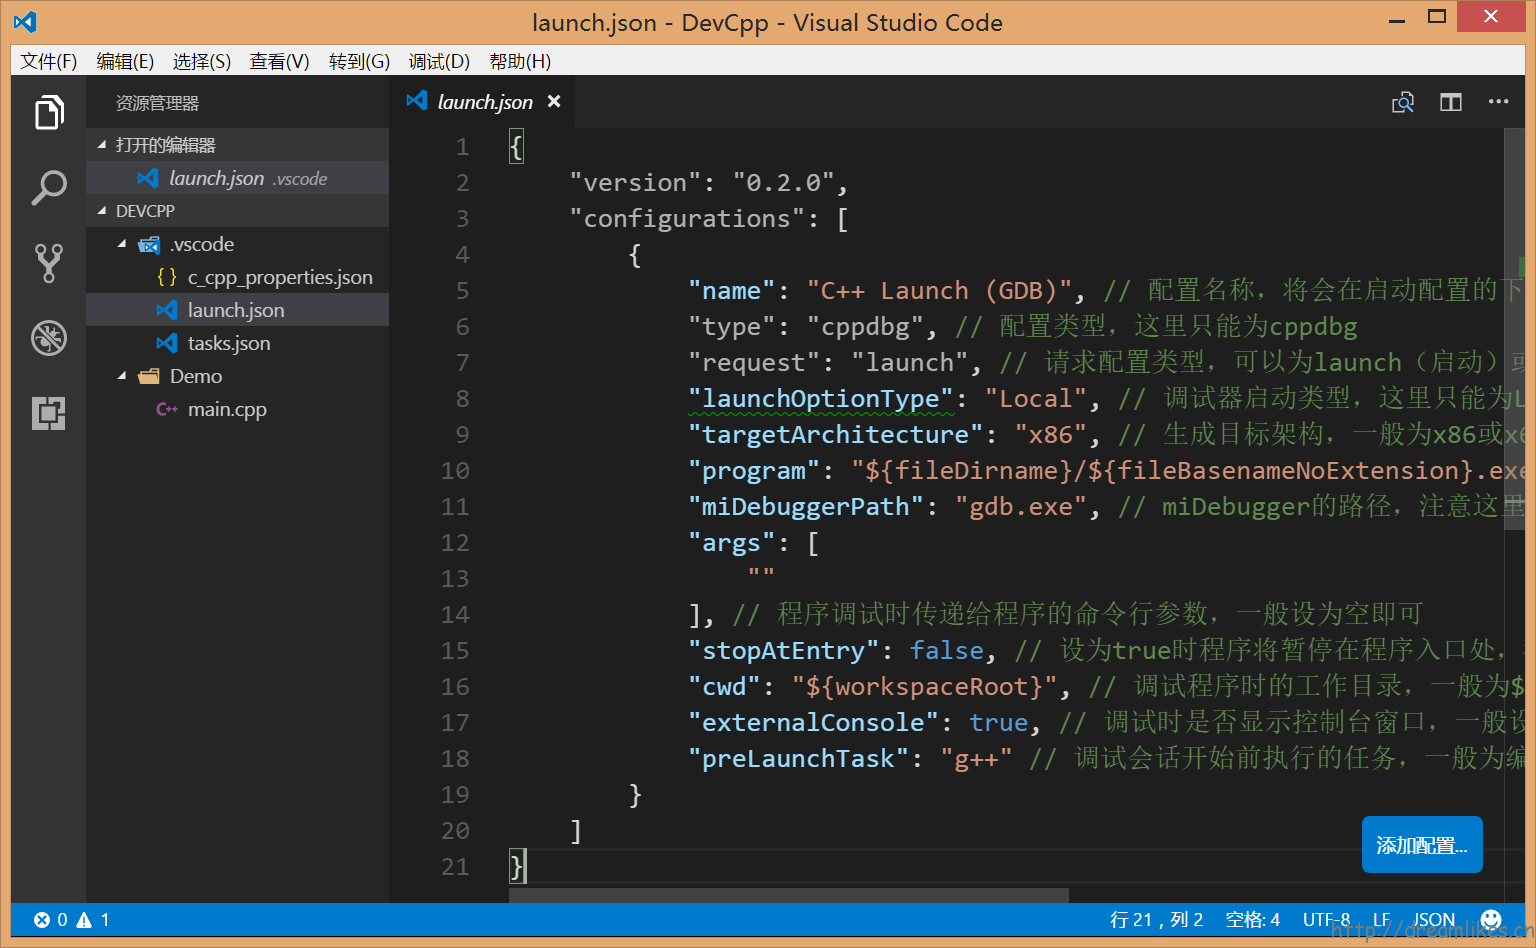
按 F5,打开 launch.json 文件,编辑并保存:
1
2
3
4
5
6
7
8
9
10
11
12
13
14
15
16
17
18
19
20
21
| {
"version": "0.2.0",
"configurations": [
{
"name": "C++ Launch (GDB)",
"type": "cppdbg",
"request": "launch",
"launchOptionType": "Local",
"targetArchitecture": "x86",
"program": "${fileDirname}/${fileBasenameNoExtension}.exe",
"miDebuggerPath": "gdb.exe",
"args": [
""
],
"stopAtEntry": false,
"cwd": "${workspaceRoot}",
"externalConsole": true,
"preLaunchTask": "g++"
}
]
}
|
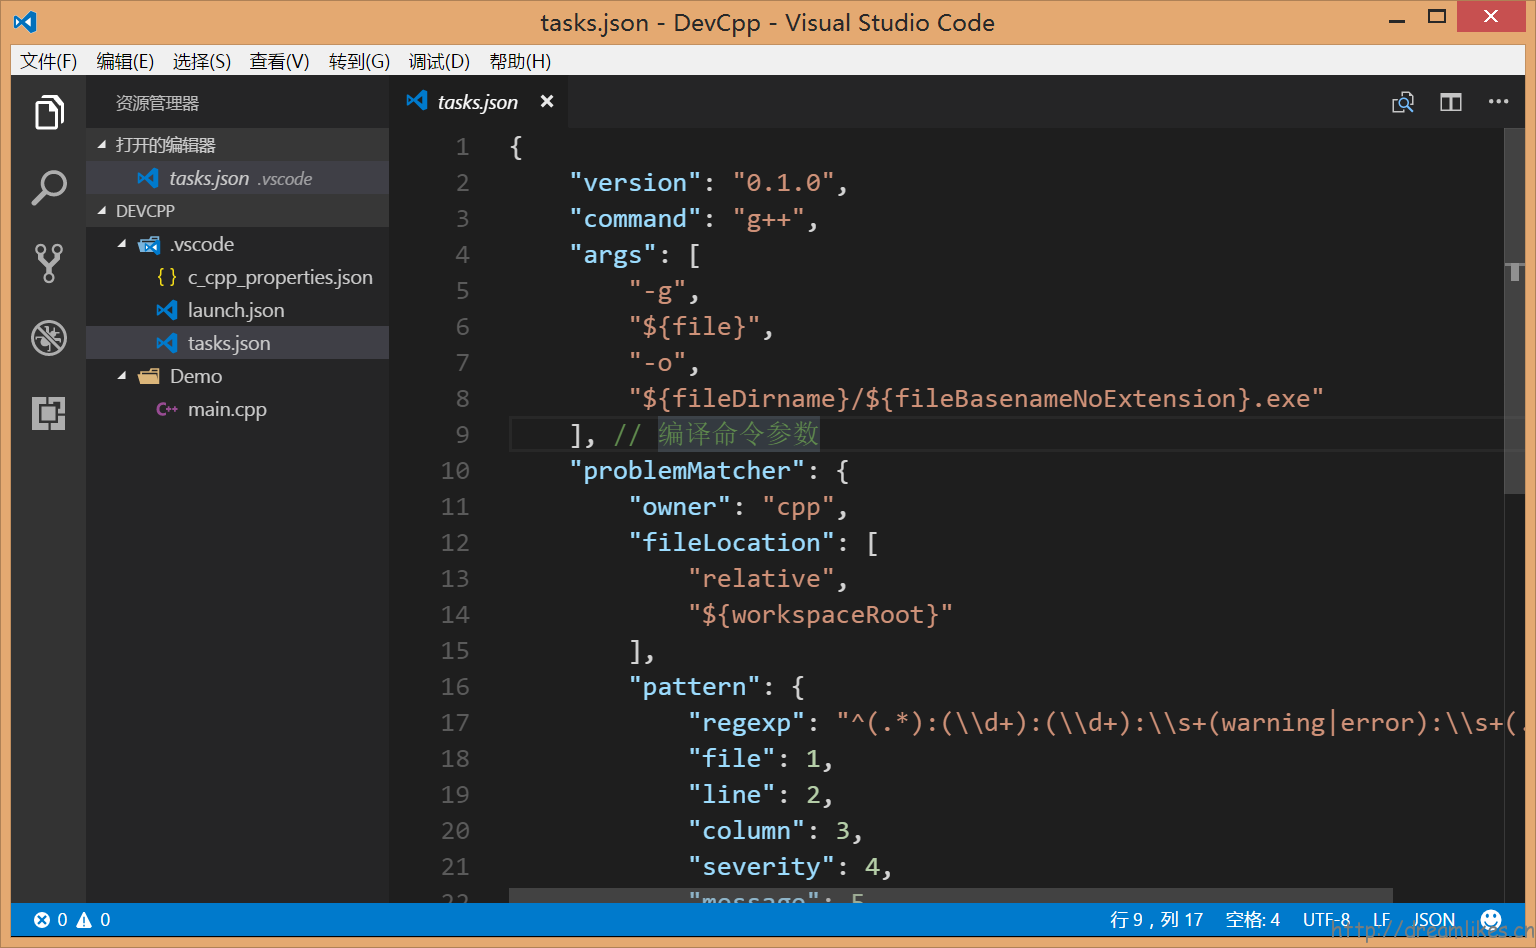
按 F1 键,出来输入框后,输入 task,选择 “配置任务运行程序”,再随便选一项,编辑并保存 tasks.json:
1
2
3
4
5
6
7
8
9
10
11
12
13
14
15
16
17
18
19
20
21
22
23
24
25
| {
"version": "0.1.0",
"command": "g++",
"args": [
"-g",
"${file}",
"-o",
"${fileDirname}/${fileBasenameNoExtension}.exe"
],
"problemMatcher": {
"owner": "cpp",
"fileLocation": [
"relative",
"${workspaceRoot}"
],
"pattern": {
"regexp": "^(.*):(\\d+):(\\d+):\\s+(warning|error):\\s+(.*)$",
"file": 1,
"line": 2,
"column": 3,
"severity": 4,
"message": 5
}
}
}
|
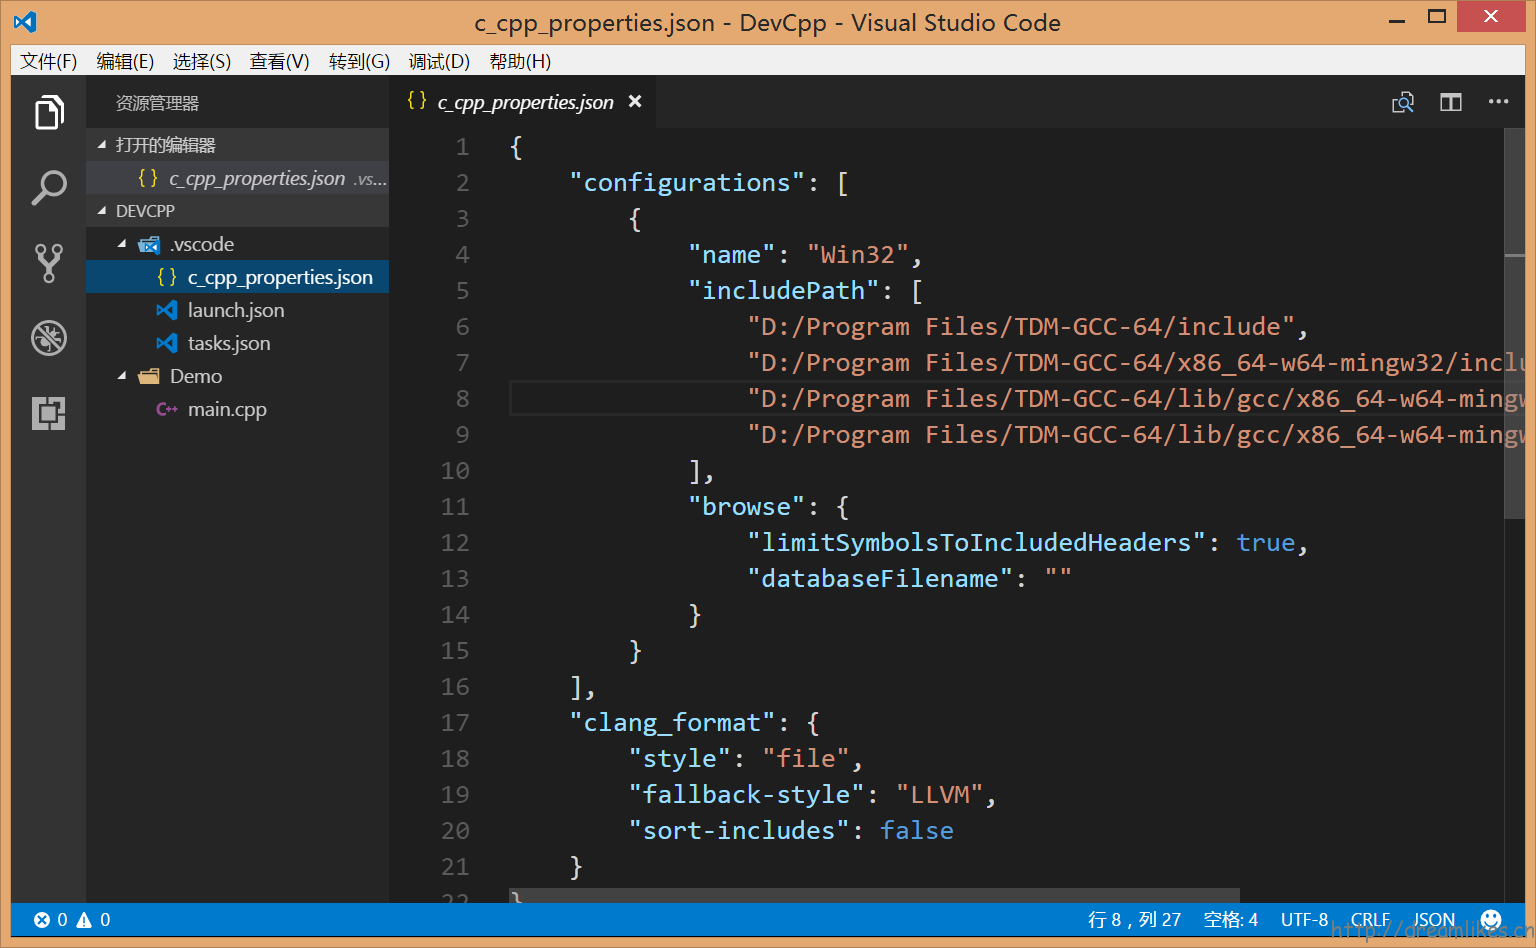
在.vscode 目录下新建文件 c_cpp_properties.json,编辑并保存:
1
2
3
4
5
6
7
8
9
10
11
12
13
14
15
16
17
18
19
20
21
22
| {
"configurations": [
{
"name": "Win32",
"includePath": [
"D:/Program Files/TDM-GCC-64/include",
"D:/Program Files/TDM-GCC-64/x86_64-w64-mingw32/include",
"D:/Program Files/TDM-GCC-64/lib/gcc/x86_64-w64-mingw32/5.1.0/include",
"D:/Program Files/TDM-GCC-64/lib/gcc/x86_64-w64-mingw32/5.1.0/include/c++"
],
"browse": {
"limitSymbolsToIncludedHeaders": true,
"databaseFilename": ""
}
}
],
"clang_format": {
"style": "file",
"fallback-style": "LLVM",
"sort-includes": false
}
}
|
其中 includePath 项的路径更改为你安装的 TDM-GCC 的实际路径,这一项是让 VSCode 识别到 C++ 的头文件,不然找不到的时候会报错,编译不成功。
调试 C++ 程序
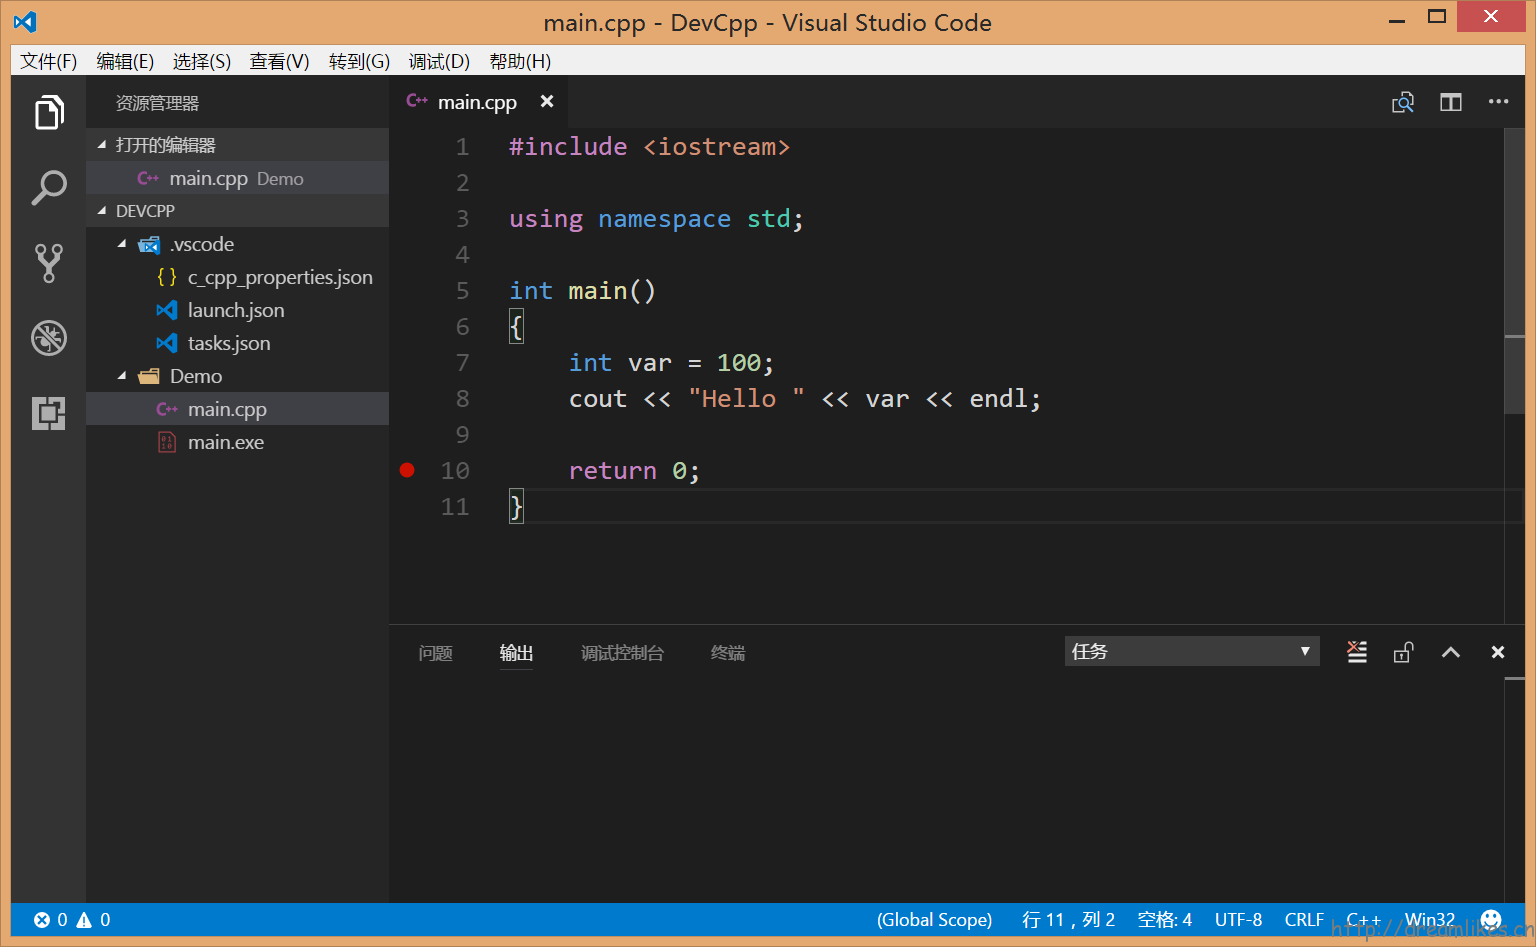
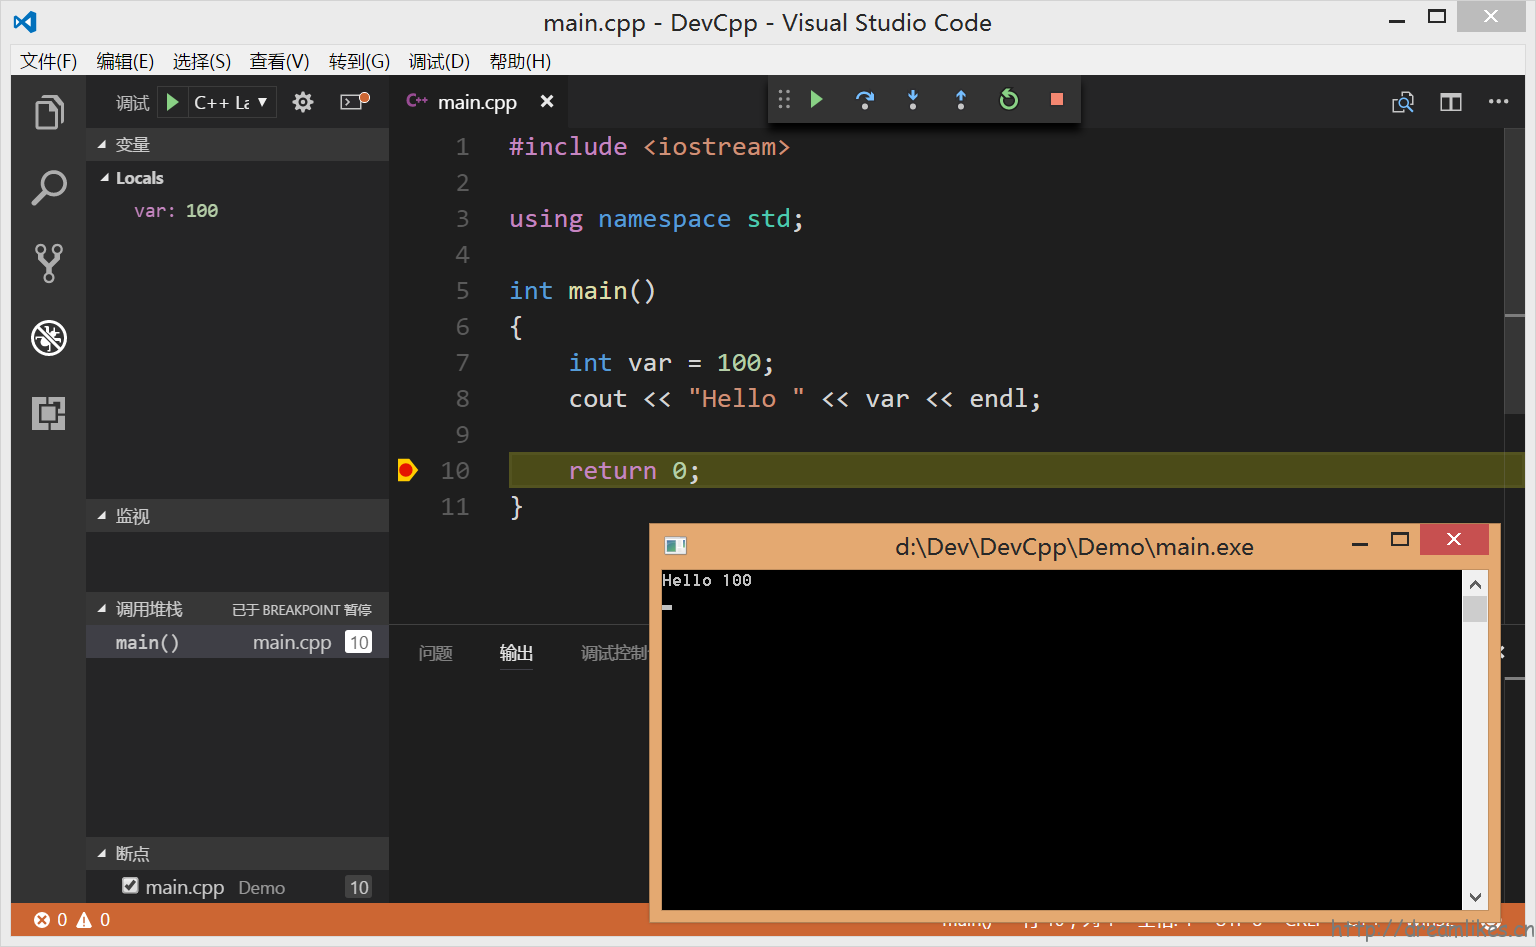
新建 main.cpp 文件,编辑并保存:
1
2
3
4
5
6
7
8
9
10
11
| #include <iostream>
using namespace std;
int main()
{
int var = 100;
cout << "Hello " << var << endl;
return 0;
}
|
在 return 0 处下断点,按 F5 进行调试(如果环境变量还没生效,重启下就好):
使用 Make 编译工程(可选)
如果使用 g++ 不能满足需求,还可以选择 Make 进行工程编译, 按 F5,打开 launch.json 文件,编辑并保存:
1
2
3
4
5
6
7
8
9
10
11
12
13
14
15
16
17
18
19
| {
"version": "0.2.0",
"configurations": [
{
"name": "C++ Launch (GDB)",
"type": "cppdbg",
"request": "launch",
"launchOptionType": "Local",
"targetArchitecture": "x86",
"program": "${fileDirname}/main.exe",
"miDebuggerPath": "gdb.exe",
"args": [],
"stopAtEntry": true,
"cwd": "${workspaceRoot}",
"externalConsole": true,
"preLaunchTask": "build"
}
]
}
|
编辑并保存 tasks.json:
1
2
3
4
5
6
7
8
9
10
11
12
13
14
15
16
17
18
19
20
21
22
23
24
25
26
27
28
29
30
31
32
33
34
35
36
37
38
39
40
41
42
43
| {
"version": "0.1.0",
"command": "mingw32-make",
"isShellCommand": true,
"isBuildCommand": true,
"showOutput": "always",
"echoCommand": true,
"suppressTaskName": true,
"options": {
"cwd": "${fileDirname}"
},
"tasks": [
{
"taskName": "build",
"args": [
"all"
]
},
{
"taskName": "clean",
"args": [
"clean"
]
}
],
"problemMatcher": {
"owner": "cpp",
"fileLocation": [
"relative",
"${workspaceRoot}"
],
"pattern": {
"regexp": "^(.*):(\\d+):(\\d+):\\s+(warning|error):\\s+(.*)$",
"file": 1,
"line": 2,
"column": 3,
"severity": 4,
"message": 5
}
}
}
|
在工程目录下新建 Makefile 文件:
1
2
3
4
| all:
g++ -static -g -o main.exe classdemo.cpp main.cpp
clean:
del /f *.o main.exe
|
然后建立三个工程文件做测试:
1
2
3
4
5
6
7
8
9
10
11
|
#ifndef CLASSDEMO_HPP
#define CLASSDEMO_HPP
class Classdemo {
public:
void greet();
};
#endif
|
1
2
3
4
5
6
7
8
|
#include "classdemo.h"
#include <iostream>
void Classdemo::greet() {
std::cout << "Hello" << std::endl;
}
|
1
2
3
4
5
6
7
8
9
10
11
|
#include "classdemo.h"
int main()
{
Classdemo classdemo;
classdemo.greet();
return 0;
}
|
测试结果: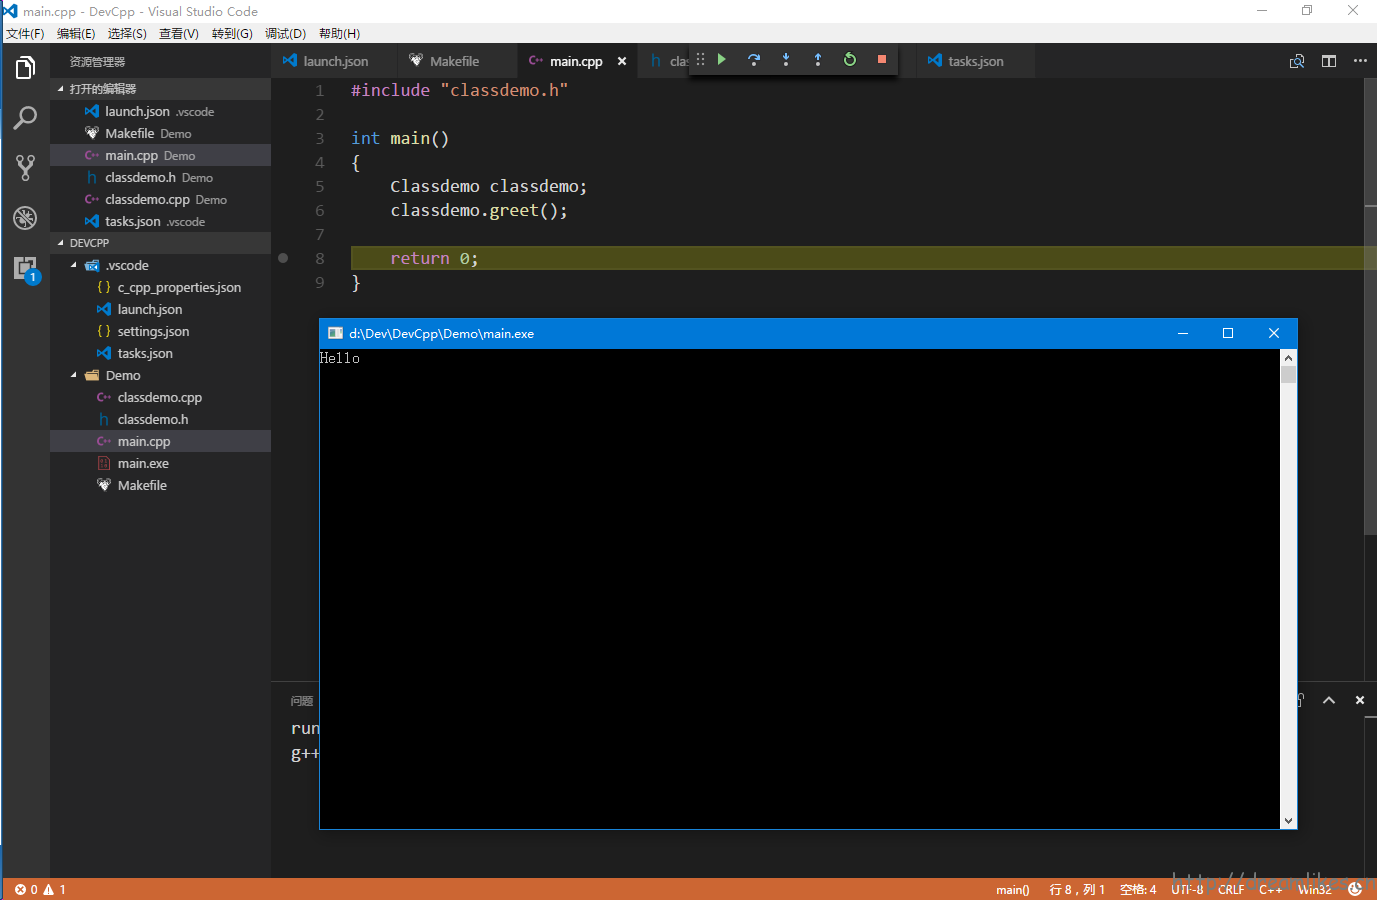
这个插件自带的格式化工具 ClangFormat,如果不自己配置好文件好像会有点问题,所以要自己处理下。 先找到 clang-format.exe 文件,位于:
1
| %USERPROFILE%\.vscode\extensions\ms-vscode.cpptools-0.10.5\LLVM\bin
|
在命令提示符下,执行:
1
2
3
| cd /d %USERPROFILE%\.vscode\extensions\ms-vscode.cpptools-0.10.5\LLVM\bin
clang-format -style=llvm -dump-config > .clang-format
|
这样就可以生成 LLVM 风格的配置文件.clang-format,把这个文件剪切到 VSCode 的 CPP 工程目录,下次格式化代码就没问题了。其他格式化风格的,看官网文档:Configurable Format Style Options
参考资料